Understanding computer graphics is hard. It is even harder to figure out where to start. This guide aims to provide a top-level understanding of common terms and processes that make pictures happen. The examples are implemented using Blender and Unreal Editor and do not require any programming or art skills.
Vertices
Vertices are an important building block of computer graphics. A vertex is a single point in a virtual space that can be implemented in multiple different ways. The most basic version of a vertex in a 3d space consists only of the values X, Y, Z that represent its position. Vertices are commonly used to define lists of triangles that represent a 3d mesh because triangles can be easily rendered by GPU programs called shader.

Back-Face Culling
Triangles have a front-face and a back-face. Usually only triangles facing the player are rendered as this almost halves the number of triangles that have to be rendered on screen. This technique is called back-face culling and leverages the assumption that you shouldn’t be able to see the back-faces of solid 3D objects.
UV-Mapping
The first common extension of vertices are a set of texture coordinates usually referred to as UV-coordinates and are used for a process that is called UV-mapping. The two values u and v are ranging from 0 to 1. They reference a point in the 2d space of an image with (0.5, 0.5) representing the center. If you create a triangle in 3d space with 3 distinct UV-coordinates you can visualize that triangle in the textures 2d space. The UV-coordinates for each rendered pixel of the triangle are interpolated and used to look up a specific pixel from a texture in a process called texture-sampling.

Normal Maps
The combination of UV-mapping and texture-sampling can also be used to implement normal-maps to create more detailed models without using more vertices. Normal maps are used to ‘bend light with math’. This creates an illusion of bumps and dents that are missing from the mesh.
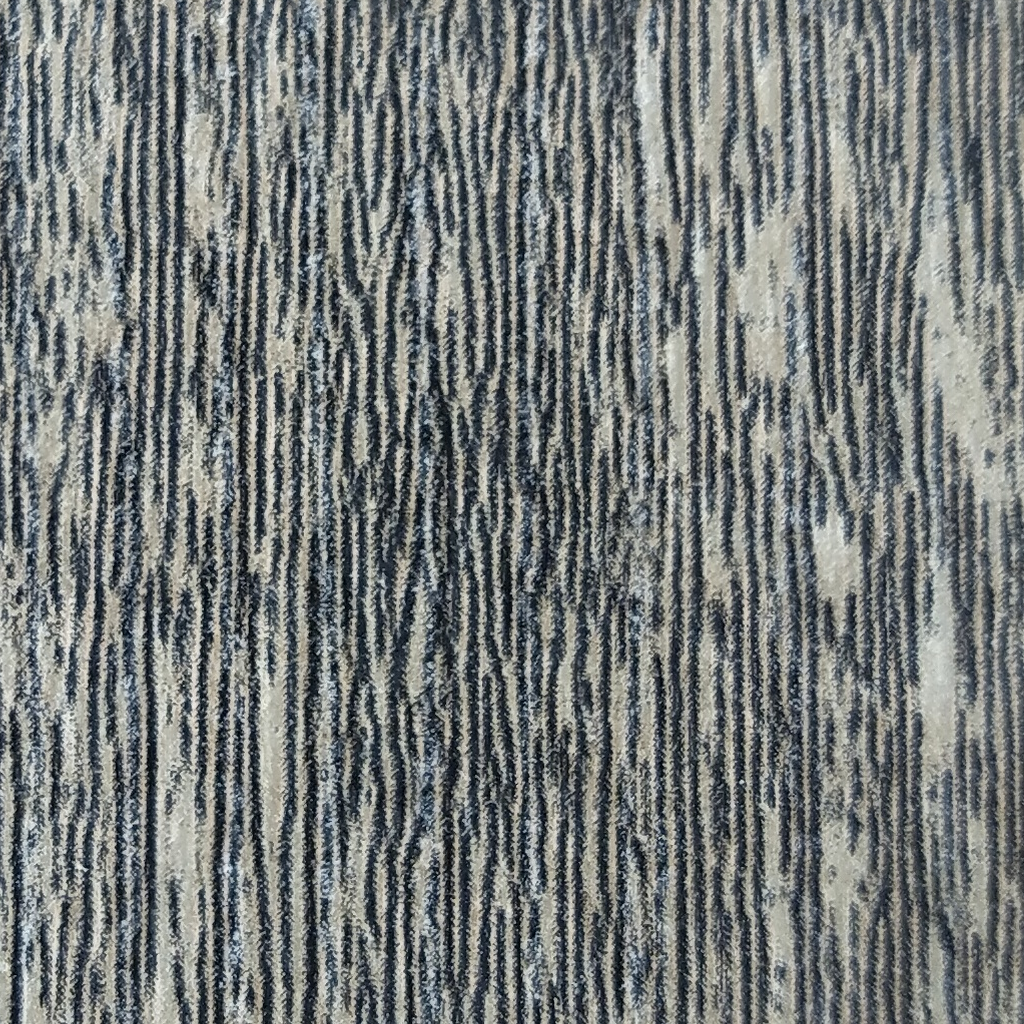
The Texture 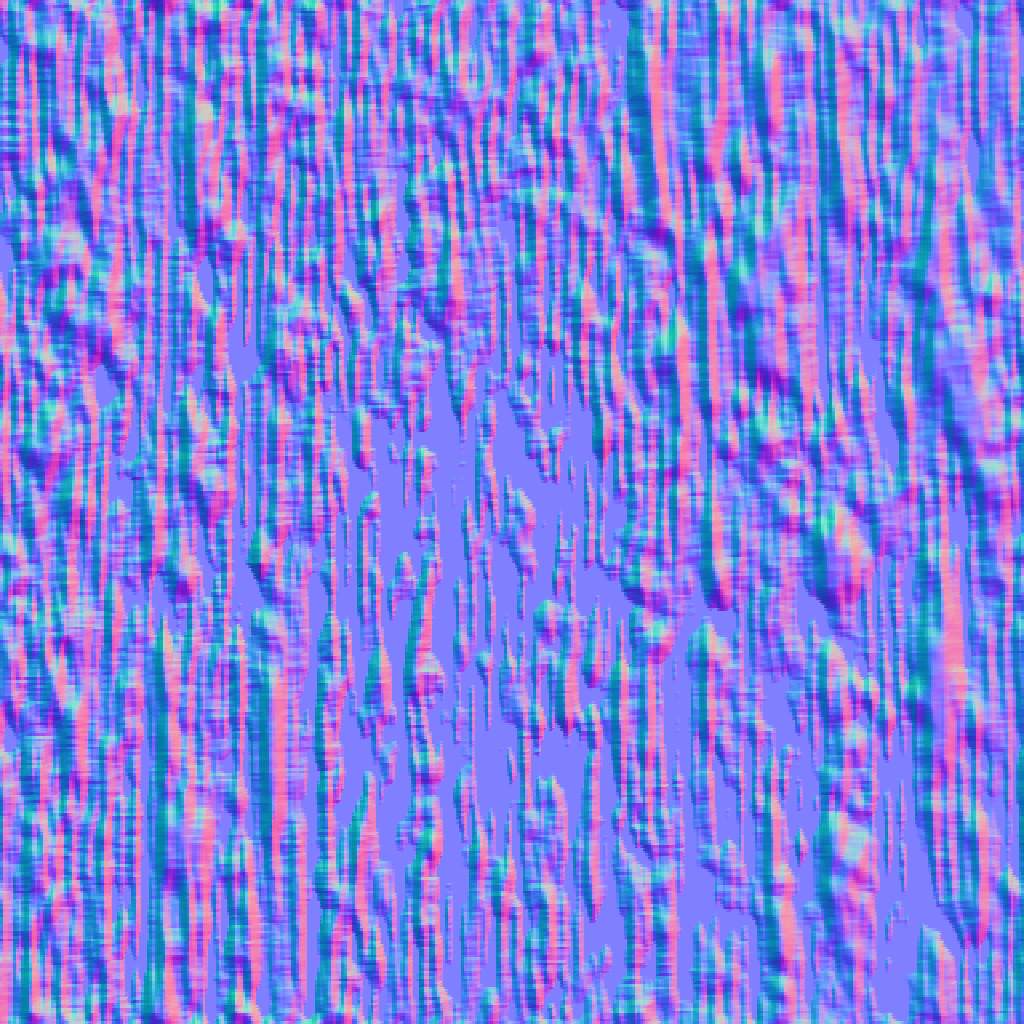
The Normal Map 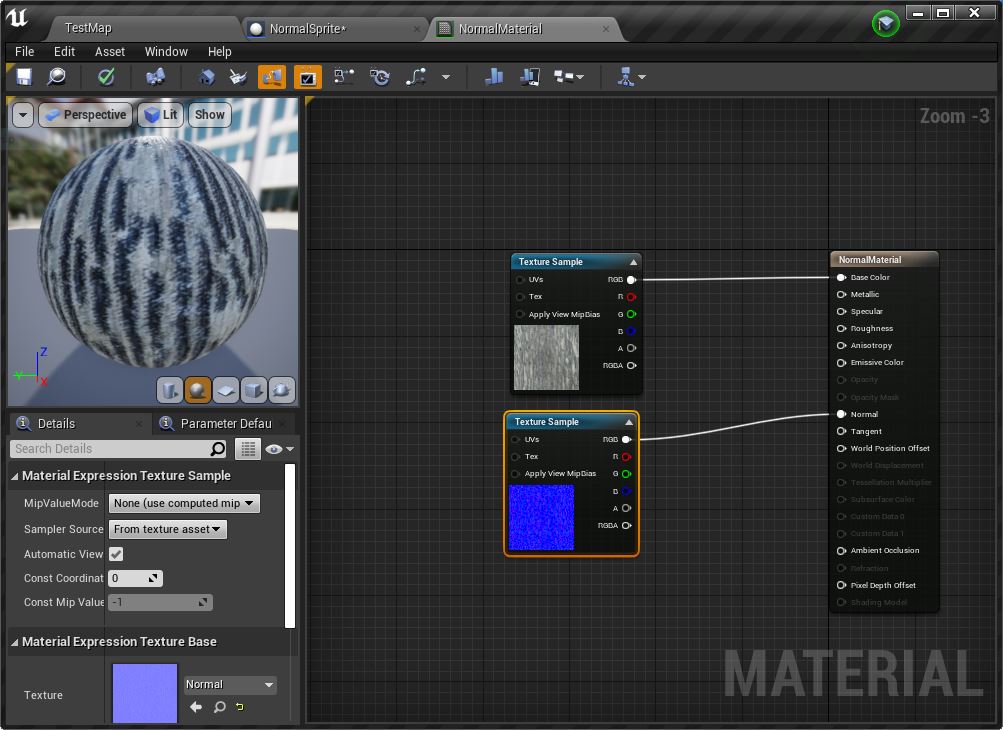
The Material in Unreal Editor
Texture Masks
UV-Mapping can also be used to implement texture-masks to enable color customization. Masking a texture is similar to setting up the texture itself. You assign texture coordinates to the 3d model and paint the areas you want to mask. The mask acts as a switch between the texture and a dynamically specified color on each rendered pixel. A common RGBA texture mask comes with 4 switches that enable you to blend and combine a total of 5 textures.
The Mesh 
The UV-Map 
The Texture 
The Mask 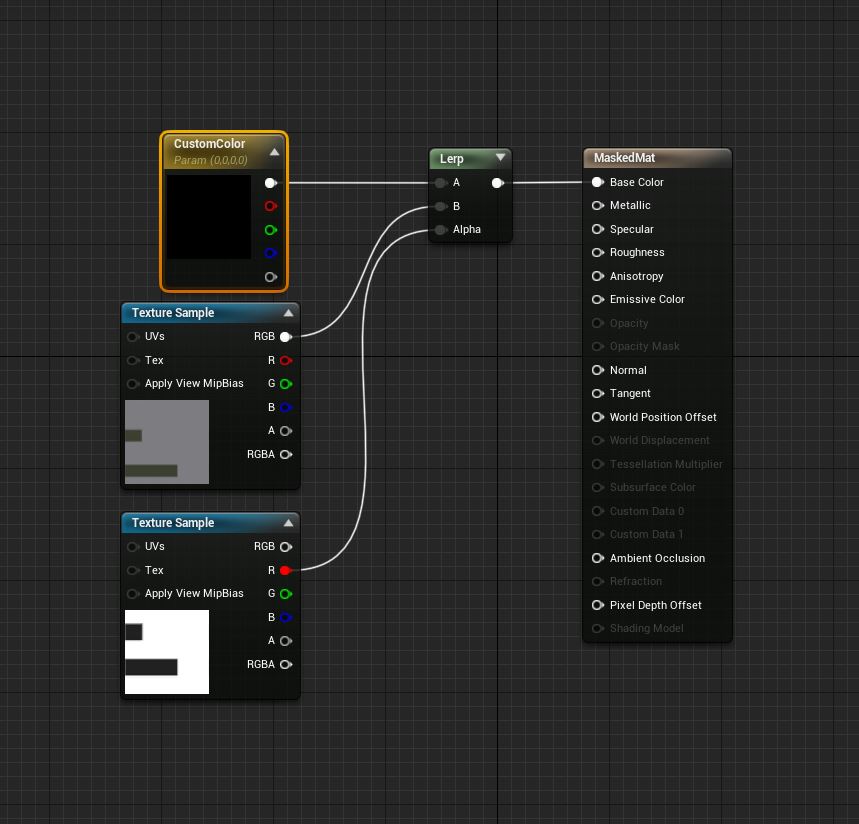
The Material in Unreal Editor
Vertex Color
Another common extension of vertices is the addition of a vertex color. A vertex color is usually represented by 1-4 values but can be even higher depending on the use case. Vertex color is used to mix and blend textures on terrains or walls that would otherwise look very stale. This is achieved by associating each value of the vertex color with a different texture and by blending accordingly. This effect works better with models that have lot of vertices as vertex coloring with very simple meshes does not allow for enough details.
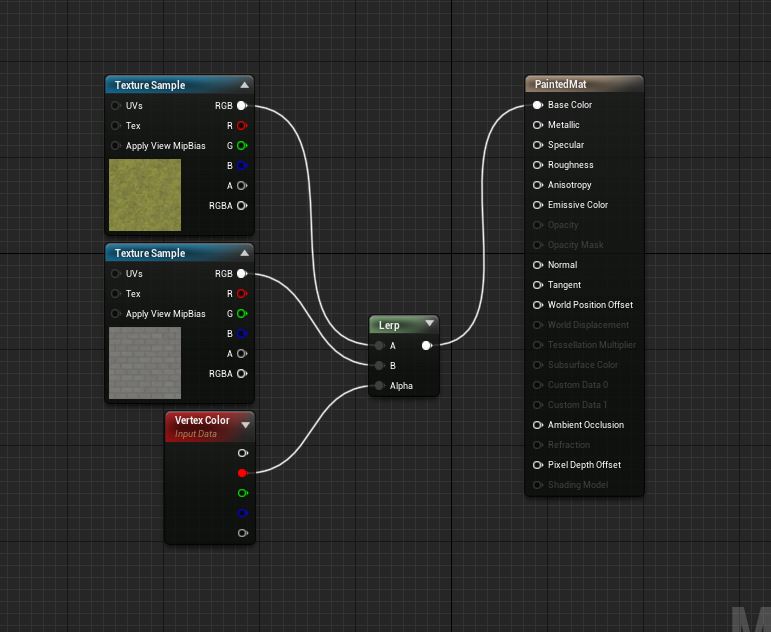
The Material in Unreal Editor 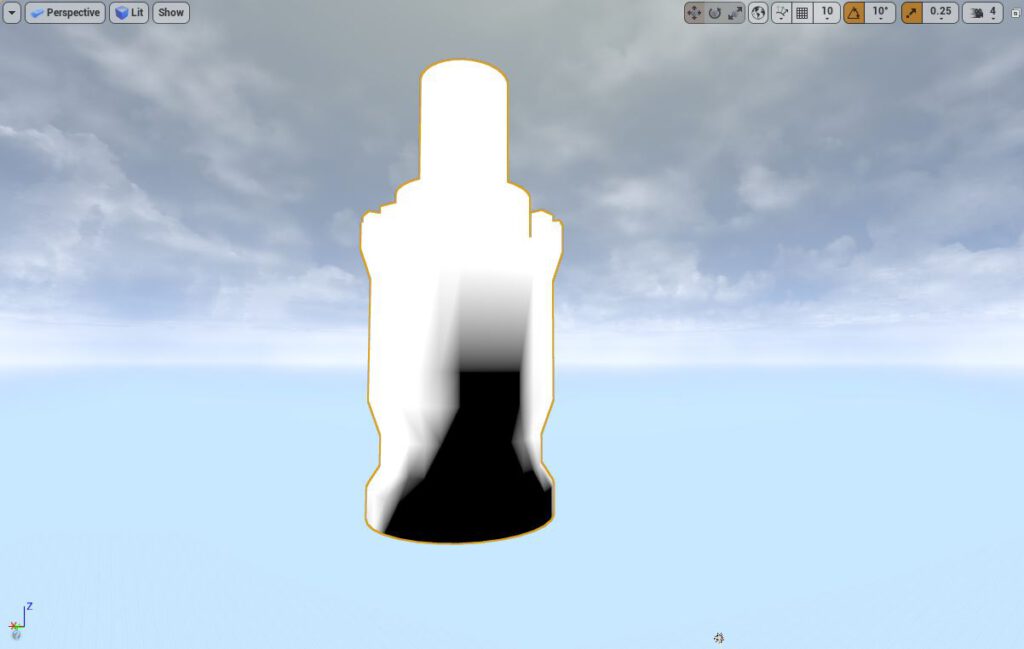
A Vertex Color Visualization
| A Quick Comparison | |
|---|---|
| Vertex Coloring | Texture Masking |
| – no additional texture required – quality depends on vertex density – information stored in vertices – designed to create endless variations – used for level design | – information stored in texture – independent of underlying mesh – typically one mask per object – designed for dynamic coloring – used for gameplay features |
This was just a quick peak into the world of rendering techniques. Let me know what you want to see next.
Hope that helps.